Sunday, September 26, 2010

baking at night and cookies

Raise your hand if you like to bake at night! This is the part where my right arm would shoot up and my hand would wave around from side to side eagerly. There's something about whisking together ingredients, greasing a cookie sheet, or flouring a cake pan once the sun has gone down that really relaxes me. Since I work five days a week morning to evening, it's always made sense to just break the eggs at night ;) Not to mention that it's been over 90 degrees in SoCal this whole week, so it definitley makes it more comfortable to be around the oven at night.

Now lets talk about chocolate covered raisins. SO ADDICTIVE. You can't just have one chocolate covered raisin! I learned this the hard way after buying them in bulk from Costco. Those little candies have found their way into my heart and stomach in the best way.  I threw some into my cookie batter last night and *oy vey* am I glad that I did! These cookies were out of this world fantastic! Top of the list tasty.

1/2 cup (1 stick) butter, softened
2/3 cup brown sugar, packed + 1/4 cup brown sugar, packed
1 egg
1/2 teaspoon vanilla extract
3/4 cup all-purpose flour
1/2 teaspoon baking soda
1 teaspoon ground cinnamon
1/4 teaspoon salt
1 1/2 cups rolled oats
1/2 cup chocolate covered raisins

1. In the bowl of a stand mixer fitted with the paddle attachment, cream together the butter, brown sugar, egg and vanilla until smooth. In a separate bowl, whisk flour, baking soda, cinnamon and salt together.

2.Stir flour mixture into the butter mixture. Stir in the oats, chocolate covered raisins and walnuts.

3. Drop batter by heaping tablespoons onto the prepared baking sheet, spacing the cookies two inches apart. Place baking sheets in the refrigerator for at least 30 minutes.

4. Preheat oven to 350°F and place the oven rack in the center of the oven. Bake cookies in preheated oven for 15 , or until the edges are golden brown and the tops look a little undercooked. Allow cookies to sit on the hot baking sheet for five minutes before transferring them to a wire rack to cool.

Yields: 24 delicious cookies

Monday, September 13, 2010

You are welcome


My jeans are usually tight on Monday mornings. I  throw caution to the wind on weekends and don't follow any type of healthy diet or exercise regimen like I would  normally on a weekday, so come Monday morning I always expect my jeans to be a little tighter and I dress to accommodate my temporary pot belly. Today was a little different. I almost called out of work today. Eventually, after an hour in front of the mirror I ended up wearing the jeans but I did pair them with high heels to give my legs that sleek  "I didn't eat cake all weekend" skinny appearance. Eye tricks, ladies. But even after all of that hell, I think that making this cake was, hands down, the best decision that I made all weekend. There is a reason that I ate so much of it. Every bite was a bursting fork full of chocolate flavors and delight. Not only from the cake, but from the gooey chocolate glaze and mini chocolate chips. I love getting a bite with a little chocolate chip hidden away in the mix! This cake is super easy to put together , but it's even easier to scarf it down without realizing. You've been warned.

 CHOCOLATE CHOCOLATE CHIP CAKE
1 18.25-oz package chocolate cake mix (I used a cake mix with the words "fudge" and "super moist" on the box)
1 3.9-oz package instant chocolate pudding mix
1 cup vegetable oil
4 eggs
1/2 cup hot water
1 cup sour cream
1 teaspoon vanilla extract
1 cup mini semi-sweet chocolate chips

1. Preheat oven to 350 degrees F. Grease and flour a bundt pan.
2. Combine cake mix, pudding mix, oil, eggs, hot water, sour cream and vanilla. Beat until smooth. Stir in chocolate chips. Pour batter into bundt pan.
3. Bake for 1 hour. Allow to cool for 10 minutes, then invert cake onto wire rack and let cool completely.

DARK CHOCOLATE GLAZE
4 oz semi-sweet dark chocolate
3 tbsp butter
1 tbsp milk
1 tbsp light corn syrup
1/4 tsp vanilla

In small, heavy saucepan or microwave oven on medium, melt broken chocolate with butter. Stir frequently until smooth. Remove from heat. Stir in milk, syrup and vanilla. When glaze is cool, pour onto cake. Let glaze run down sides. Chill about 10 minutes to set glaze.

Sunday, September 5, 2010

Heavenly Chocolate Chip Cookies

The other night I couldn't think of what I wanted to bake. Part of me wanted to bake a lovely, rich, chocolate cake..but the other reasonable part that hates the treadmill realized that maybe a whole cake to myself wasn't the best way to go. So my two parts agreed that a cookie would be safe. Sike! I fooled myself. Sure, if I had just baked the cookie neatly and only had one or two before shutting down the kitchen for the night, I wouldn't be in my gym clothes right now lacing up my tennis shoes.  Self control baking isn't my style. From licking the beaters and eating raw dough (I know, I know!) to taste testing the first batch out of the oven and being curled up on the couch at 10pm with cookies and ice cream watching television. You could say that I thew caution to the wind. I should also point out that I  munched on these cookies after lunch on Saturday and again after dinner. I may have had one for breakfast. I'm going to justify my actions by saying that these cookies are so freaking delicious! I've baked (and eaten) plenty of chocolate chip cookies in my day and these ones are up at the tippity top on my list. I think I knew what I was getting myself in to from the beginning. As soon as I read the desciption of the recipe on A Southern Grace, I had a feeling that this was going to be a success. She descibes the cookie as"drool worthy" and "heavenly" and I have to say that if I'm going to take someone's word for a delicious description.. it's going to be hers. Maybe it's because everything on her site seems taste bud successful or maybe because our names are so similar.. or both ;)

Chocolate Chip Cookies
Recipe from A Southern Grace

1/2 cup butter
1/2 cup shortening
1 cup sugar
1/2 cup brown sugar, tightly packed
2 eggs
1 tablespoon vanilla
2 cups all-purpose flour
1 teaspoon baking soda
1/2 teaspoon salt
2 cups miscellaneous morsels (I used semi-sweet and white chocolate)

1. In a large bowl, beat the butter with the shortening; gradually beat in the sugars until smooth. Beat in eggs and vanilla. Add the flour, baking soda, and salt, and beat into the wet mixture. Stir in the morsels and refrigerate the dough for 30 minutes (hardest part!).
2. Preheat oven to 375 degrees.
3. Drop dough by tablespoonfuls onto appropriate baking sheets. For best results, flatten to 1/2-inch thickness with a fork. Bake for 8 to 9 minutes or until the edges are golden and centers are still slightly underbaked. Let the little pieces of Heaven cool on the pans for 5 minutes. Transfer to wire racks to let cool completely.

Monday, August 30, 2010

Peach Crumb


Every Sunday my mom, dad, sister, and I wake up and drive over to the little church in town. It's a great church, but when I say that it's little I mean just that: it is little. After service, the people gather in the back and eat packaged cookies and jumbo wheat thins with their coffee. Even though I'm a big fan of the wheat thin cracker, I couldn't help but feel a little bad about the refreshment selection. So I set my alarm a little early yesterday and starting peeling and slicing juicy peaches to make this magnificent peach crumb. The original recipe was for Peach Crumb Bars but I sort of winged it and layed the dough in a quiche dish. It wasn't so much of a bar as it was a crumbly pie with peach filling. Call it what you will because either way it was incredibly flavorful and delightful. I only had a small piece because I figured that there would be some left over and I could pig out in the privacy of my own house. Boy was I wrong. The plate was returned to me wiped clean, literally. I took this as a compliment and figured that next time I better bake two :)

Peach Crumb Bars
Recipe from Brown Eyed Baker

For the Dough:
3 cups all-purpose flour
1 cup granulated sugar
1 teaspoon baking powder
¼ teaspoon salt
1 cup (2 sticks) unsalted butter, cold
1 egg, lightly beaten

For the Filling:
5 cups diced peaches (7 peaches, peeled)
2 tablespoons lemon juice
½ cup all-purpose flour
1 cup granulated sugar
¼ teaspoon salt
½ teaspoon ground cinnamon
¼ teaspoon ground nutmeg

1. Preheat the oven to 375 degrees F. Grease a 9×13-inch baking pan.
2. For the Dough: In a medium bowl whisk together the flour, sugar, baking powder and salt. Use a pastry blender to cut in the butter, and then the egg. The dough will be crumbly. Pat half of the dough into the prepared pan. Place the pan and the remainder of the dough in the refrigerator while you prepare the filling.
3. For the Filling: Place the diced  peaches in a large bowl and sprinkle with lemon juice. Mix gently. In a separate bowl whisk together the flour, sugar, salt, cinnamon and nutmeg. Pour over the peaches and mix gently.
4. Spread the peach mixture evenly over the crust. Crumble the remaining dough over the peach layer.
5. Bake in the preheated oven for 45 minutes, or until the top is slightly brown. Cool completely before cutting into squares.

Saturday, August 28, 2010

Frisco and Nutella

I just got back from San Francisco last week where all I did was eat, eat, EAT. I had the best time on my trip and not just because of the food.. although that was a big part of it (lets not lie). It's good to be back home though and on the computer catching up on all the wonderful recipes from the blogs I follow. I feel very out of the loop if I don't check my Reading List, so I'm glad to be back "in" :)! Now lets get to what I had a hankering for all week: Nutella! Actually it started out as a little craving for Ferrero Rocher candies and then this led to a just plain chocolate craving and then that led back to a Nutella kick. At first I decided to take the easy "eat it from the jar with a spoon" way out, but concluded that I should take advantage of the extra jar that I bought and use it as an ingredient. The result? Self Frosting Nutella Cupcakes. You would think that this would be enough. I mean its cupcakes that frost themselves with Nutella! I took it a little further though and add some Nutella frosting. I had also wanted to add a Ferrero Rocher on each cupcake but I didn't remember this until I was walking out of the grocery store. So please image a beautiful fine hazelnut chocolate candy sitting on top of that Nutella frosting in all of it's glory. After eating Nutella out of the jar, baking with it, frosting with it AND eating these cupcakes I learned a very valuable lesson: there is such a thing as too much Nutella. I mean this in a "I have to lay down and rub my tummy" sort of way. I was FULL of it. I'm surprised I didn't sprout hazelnuts overnight! The cupcakes were pretty good but they were lacking something. If I make them again, I would add more Nutella and maybe a little buttermilk to the batter because the plain cupcake had almost no flavor and was a little dry. They weren't bad though by any means and I'm glad that I had frosting to put them over the tasty edge.This recipe makes 12 and there are only 6 left. So .. take that how you will :)
Self Frosting Nutella Cupcakes
10 tbsp butter, softened
3/4 cup white sugar
3 eggs
1/2 tsp vanilla
1 3/4 cups sifted all purpose flour
1/4 tsp salt
2 tsp baking powder
Nutella, approx. 1/3 cup

1. Preheat oven to 325F. Line 12 muffin tins with paper liners.
2. Cream together butter and sugar until light, 2 minutes. Add in eggs one at a time, until fully incorporated. Don’t worry if the batter doesn’t look smooth. Add vanilla. Stir in flour, salt and baking powder until batter is uniform and no flour remains.
3. Using an ice cream scoop, fill each muffin liner with batter. They should be 3/4 full, if you’re not using a scoop. Top each cake with 1 1/2 tsp Nutella. Swirl Nutella in with a toothpick, making sure to fold a bit of batter up over the nutella. Bake for 20 minutes. Makes 12 cupcakes.

Nutella Frosting
6 tbsp butter, room temperature
4 1/2 cups powdered sugar
1/2 cup nutella
2 - 4 tablespoons milk
1/2 tsp vanilla

1. In a medium bowl combine butter, nutella, sugar, and vanilla until mixed together. Add milk to meet desired spreading consistency. Frost, frost, frost! :)

Friday, August 13, 2010

Pineapple Upside Down Cake

I've had the this almost aching culinary urge to bake a pineapple upside down cake. I'm not quite sure what triggered it or when this desire started brewing but it was just something that needed to be done. The past couple of weeks I've been searching for a recipe that I liked and slowly building up the ingredients with every trip to the market. It just so happens that everything fell into place tonight and I just had to bake this! The recipe originally says to bake in a 9x2 inch round pan but I figured that this would be the perfect opportunity to use my cast iron skillet and who doesn't love bringing one of those out, right? Since the skillet is larger, the cake came out a little flat. Other than that though (and thats no big deal!), I was super pleased with it. It easily transferred from the skillet to the plate which was great since I was really worried that the fruit or cherry pieces would be askew. I've had some troublesome experiences with cakes in the past! But it came off so neat that I didn't even want to cut into it. I resisted as long as I possibly could (honest), but after sitting on the couch fiddiling my fingers trying to ignore the smell of heaven coming from the kitchen.. I gave in! I cut myself a slice as neat as I possibly could and ate it up. This particular recipe uses buttermilk which really gave this cake an extremley moist textrure. Which I'm a fan of. I'm also a big fan of the sinful butter and brown sugar combination. And I love getting a fork full of delicious pineapple on top of all of that!

If you get that "where-is-this-coming-from?" pineapple upside down cake desire, keep this one in mind.
Pineapple Upside Down Cake

(20 oz can) 7 slices canned unsweetened pineapple, drained. Reserve 3 tablespoons of the juice.
19 maraschino cherries
3 tablespoons unsalted butter
3/4 cups packed light brown sugar
2 large eggs
2 tablespoons buttermilk
1/2 teaspoon vanilla
1 cup all purpose flour
3/4 cup granulated sugar
3/4 teaspoon baking powder
1/4 teaspoon baking soda
1/4 teaspoon salt
6 tablespoons unsalted butter, room temperature
6 tablespoons buttermilk

1. Preheat oven to 350 degrees. Have ready a 9x2 inch round cake pan (or cast iron skillet). Drain pineapple (reserving 3 tablespoons juice) and place on paper towels to absorb excess juice.
2. Place the 3 tablespoons unsalted butter in the pan/skillet. Place in the oven until teh butter is melted. Tilt to coat all sides with butter. The extra butter will settle in the pan. Sprinkle the brown sugar evenly over the bottom of the pan.
3. Place one pineapple ring in the center of the pan and arrange six more around it. Place the cherries in the center of each ring anf in the spaces inbetween them. In a small bowl, whisk together the eggs, 2 tablespoons of buttermilk and vanilla with a fork. Add reserved pineapple juice. Set aside.
4. In a mixer bowl, whisk together the flour, sugar, baking powder, baking soda, and salt. Add the 6 tablespoons of buttermilk and 6 tablespoons of unsalted butter. Beat on low speed just until the flour is moistened, then increase the speed to medium and beat for 1 1/2 minutes. The batter will be stuff. Add one third of the egg mixture at a time, beating for 20 seconds inbetween.
5. Scrape the batter over the fruit in the pan and spread evenly.
6. Bake until a toothpick inserted in the cake comes out clean, about 35 - 40 minutes (took me 35). Remove the cake from the oven and let cool for 2 to 3 minutes before unmolding.
7. Invert a serving platter on top of the pan/skillet. Cover your hands with oven mitts and turn the cake onto the platter, lift off the plan. If any of the fruit or cherry pieces are askew, use a fork and push them back into place.

Tuesday, August 10, 2010

Three Chese Pasta Bake

As you can probably tell by now, I prefer baking to cooking. It isn't that I'm a horrible chef or that I hate to cook, I just don't get the same kind of pleasure out of cooking dinner that I do from baking a splendid dessert. My mom on the other hand is a queen of all trades. She will whip up the appetizer, main course, and dessert, all the while sipping a martini and not only exceed our expectations, but enjoy the process (compliments of the martini perhaps?). I must have not inherited that gene from her. Or maybe I did and it just hasn't risen to the surface yet. Am I not living up to my full hostess potential? Will I just wake up one morning and insist upon cooking three course meals every night? Only time will tell. For now though, I thought it would be nice to cook a quick and easy dinner over the weekend. I've had this recipe stashed away on my computer for a while now and always wanted to cook/eat it. My brother is not a big pasta eater and the only way he will touch the stuff is if it hasn't been in direct contact with red sauce of any kind. He even orders his pizza without any sauce. I can't be the only one who thinks that is crazy, right? I love love love pasta and I love it even more covered (smothered) in red sauce. To each his own though I suppose. Since he is so complicated, this dish worked out perfectly for him! Not a drop of red in sight. Just creamy alfredo, ricotta, and sour cream. Not to mention cheese! I added significantly more cheese than the original recipe called for because that's pretty much my motto for any recipe with cheese. More is always better. You can't go wrong!

Three Cheese Pasta Bake
Based on this recipe 
1  (16-ounce) package ziti
2  (10-ounce) containers refrigerated Alfredo sauce
8-ounce container sour cream
15-ounce container ricotta cheese
2  large eggs, lightly beaten
1 cup  grated Parmesan cheese
1/4  cup chopped fresh parsley
2  cups  mozzarella cheese

1. Prepare ziti according to package directions; drain and return to pot.
2. Stir together Alfredo sauce and sour cream; toss with ziti until evenly coated. Spoon half of mixture into a lightly greased 13- x 9-inch baking dish.
3. Stir together ricotta cheese, eggs,  1/2 cup of Parmesan cheese, and parsley; spread evenly over pasta mixture in baking dish. Spoon remaining pasta mixture evenly over ricotta cheese layer; sprinkle evenly with 1 cup mozzarella cheese.
4. Bake at 350 for about 20 minutes. Carefully pull out the baking dish and sprinkle on remaining 1/2 cup of Parmesan cheese and 1 cup mozzarella cheese (especially in the corners). Place baking dish back in the oven and bake for another 10 minutes or until the cheese begins to bubble.

Friday, August 6, 2010

Triple Chocolate Chip Oatmeal Cookie

Today was the kind of day that needed a cookie. The kind of day that begged me for a chewy, chocolatey, straight out of the oven little piece of heaven. As I sit here updating my blog, watching 17 Again (judge me later), and taking little bites of this delicious morsel of flavor.. I realize that this is the highlight of my day. This single cookie has made my day. Keeping in mind that today is a Friday aka the gateway to the weekend and that I got paid today, well, that says a lot about this cookie- don't you think?

Triple Chocolate Chip Oatmeal Cookie
3 cups all purpose flour
1 teaspoon baking powder
1 teaspoon baking soda
1/4 salt
3 sticks unsalted butter, room temperature
2 eggs
1 1/4 cup granulated sugar
1 1/4 cups packed light brown sugar
1 tablespoon vanilla extract
1 1/2 cups rolled oats
1 cup semi sweet chocolate chips
1 cup white chocolate chips
1/2 cup butterscotch chips

1. Preheat oven to 350 degrees. Grease cookie sheet or line with parchment paper.
2. In a medium bowl whisk together flour, baking powder, baking soda, and salt. Set aside.
3. In a large mixing bowl, cream together the butter and sugars. Beat in the eggs one at a time mixing well after each addition. Mix in vanilla extract.
4. Gradually beat in the flour mixture, mixing only until the dough comes together. Do not overmix.
5. With a large wooden spoon or spatula stir in the rolled oats followed by the chocolate chips.
6. Spoon the cookies on the prepared cookie sheet about two inches apart and bake for about 14 minutes or until the cookies are slightly browned aorund the edges but still soft and puffy in the middle. Rotate the baking sheets halfway through the baking time.

Wednesday, August 4, 2010

blondie bomb

Take a good look at these deformed blondie eye sores. You see that? That is what happens when you don't measure your ingredients correctly. And when I say ingredients, I mean ingredient. Anyone care to take a guess at which important ingredient was messed with here? If you said brown sugar you would be wrong. But if you said baking powder...congratulations, you got it :). Yes, somewhere along the road 1/8 teaspoon of baking powder became 1/4 teaspoon of baking powder. And baking powder -being the important rising ingredient that it is-.. well, you can guess the rest! I couldn't have messed things up too badly though because, despite the appearance, these still tasted pretty darn good and had that distinctive molasses flavor from the dark brown sugar. They were rich, chewy, and the butterscotch chips were a delicious add in. So in the end, even though the blondies weren't perfect or very aesthetically pleasing, there was no real loss. Besides, if there's one thing I've learned from my baking (mis)adventures its that sometimes you have to make mistakes, learn from them, and hope for the very best when you pop the finished product into your mouth.

Blondies
1/2 cup of butter, melted
1 cup of tightly packed dark brown sugar
1 egg, lightly beaten
1 teaspoon of vanilla
1/2 teaspoon baking powder
1/8 teaspoon of baking soda
Pinch of salt
1 cup of all-purpose flour
1/3 cup of butterscotch chips (chopped walnuts and chocolate chips are equally tasty)

1. Preheat the oven to 350°F. 
2. Lightly butter and flour an 8x8 pan. 
3. Whisk together the melted butter and sugar in a bowl.
4. Add the egg and vanilla extract and whisk.
5. Add the flour, baking soda, baking powder, and salt, mix it all together. Add the butterscotch chips or other mix-ins.
6. Pour into the pan and spread evenly. Bake for 20-25 minutes or until a toothpick comes out clean. Allow to cool. Cut into squares and serve.

Sunday, August 1, 2010

Whopper Cookies

Recently I have been having a love affair with Whoppers malted milk balls. I'm not sure why it's a love affair, but the way that I feel when I eat them is close to what I think a love affair would feel like. I don't feel that way when I munch on my usual chocolate go-to M&Ms. Therefore it is a love affair. I hope that made sense to someone other than myself. I actually have a box right here next to me that I'm slowly munching on, dreading the moment when I reach my hand in and there is no more malty crunchy goodness. After I had purchased a few boxes at the market yesterday, I decided that instead of just eating them straight up, I would look for a simple whopper recipe online. Google led me to an incredibly simple and quick cookie baked with whoppers. The cookies themselves tasted really good. They were soft and chewy with a crunchy edge. Next time I would add more whoppers. It seemed like more of a sugar cookie with the occasional whopper as opposed to a whopper overload with a little cookie to back it up (like I was hoping). I can't really complain though. I got a genuinly good cookie out of it and was able to snack on whoppers while I was baking up the cookie and while I was enjoying the finished product. Maybe I should have made that whopper milkshake on the back of the box to go along with it. How freaking delicious does that sound?

Whopper Cookies
Recipe from Cast Sugar

2 1/4 cup all purpose flour
1 tsp. baking soda
1/2 tsp. baking powder
1/2 tsp. salt
3/4 cup butter, room temperature
1 cup granulated sugar
1/2 cup milk
1 tsp. vanilla extract
1 1/2 cup roughly chopped Whoppers
1. Preheat the oven to 350F and line a baking sheet with parchment paper.
2. In a medium bowl, whisk together flour, baking powder, baking soda and salt.
3. In a large bowl, cream together butter and sugar until light and fluffy. Stir in milk and vanilla, then gradually blend in the flour mixture. Do not overmix; stir only until no streaks of flour remain.
4. Stir in the chopped Whoppers
5. Drop into 1-inch balls (tbsp.-sized balls) on the prepared baking sheet and bake for 12-14 minutes, until lighty browned.
6. Cool on baking sheet for 2-3 minutes, then transfer to a wire rack to cool completely.

Makes about 3 dozen cookies.

Sunday, July 25, 2010

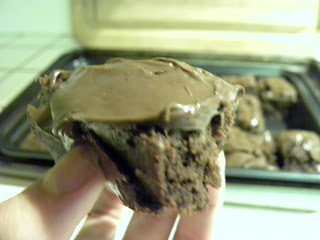
Nutella Chocolate Fudge Brownies

Believe it or not, I've never baked brownies from scrath that didn't end up tasting dry and dull (ie: tasteless). I also have never eaten Nutella before. All of this changed over the weekend. These brownies actually came out of the oven moist with the perfect amount of crunch on the top. The chocolate chips were like a welcome pocket of chocolate bursting from random bites. The brownies actually reminded me of the Mrs. Fields brownies that my sister and I used to convince my grandma to buy us at the mall when we were little girls. What made these even better was that the recipe calls for spreading Nutella over them! I love Nutella. I can say that now. I might start eating it out of the jar or spreading it randomly on cookies and crackers. These brownies really were so good that you don't need the Nutella spread. They can hold their own. If tomorrow wasn't Monday, I would bake up another batch and eat them at my pleasing. But I can't stroll into work with chocolate crumbs around my mouth and my clothes not fitting. If only..

Nutella Chocolate Fudge Brownies
Recipe from Bunny's Warm Oven
4 - one ounce squares unsweetened chocolate
1 cup unsalted butter (2 sticks)
2 1/2 cups sugar
4 large eggs
1 Tablespoons pure vanilla
1/8 teaspoon salt
1 cup unbleached white flour
1 cup chocolate chips, optional (recommended)
1/2 - 1 whole jar of Nutella

Preheat oven to 350 degrees F. Butter or spray and flour a 9 X 13 inch glass or non-stick baking pan.
Chop unsweetened chocolate and melt chocolate and butter in a large saucepan over medium heat. Do not burn. Remove from heat.
Using a wooden spoon or spatula, add sugar and stir until well mixed.
Add eggs, vanilla and salt and beat well with a wooden spoon.
Fold in flour and mix just until smooth. Do not over mix. Fold in chocolate chips.
Pour into prepared pan.
Bake for 35-40 minutes or until knife comes out clean.
Cool for about 15 minutes, then spread desired amount of Nutella over warm brownies.
Cool completely before cutting into squares.

Don't you hate waiting for the cooling process to be complete?

Saturday, July 17, 2010

Mission: Chocolate

I had a craving this evening when I got home from work. Actually, craving is putting it lightly. It was more of an intense and urgent desire. It was a need for chocolate. Something triggered in a section of my brain as I sat at my desk waiting for the clock to strike 6:00 and my boss to sign my pay check. I tried to be good and soothe my craving with some handfuls of Special K Chocolate Delight cereal. But I'm only human. A human girl. A human girl who needed a serious chocolate fix. I made the decision to indulge myself with this chocolate cobbler. The best way to describe this is a large chocolate molten cake. The chocolate batter is spread in the baking dish, a mixture of sugars and cocoa powder is sprinkled over it, and then it's topped off with hot water before being baked. The original recipe doesn't call for chocolate chips, but I couldn't resist adding some to the batter. As soon as you cut into the cakey top of this cobbler, the perfect amount of rich chocolate oozes out for your delight. I'm telling you.. this is a dessert that was created to be served and melted into vanilla ice cream. Any flavor ice cream would be delicious (I'm sure), but there's something about vanilla that always seems to compliment certain flavors. After eating a two bowl(s) and vegging out on the couch rubbing my stomach with what I'm sure was a silly grin on my face, I felt quite satisfied. I've always been a fan of giving into cravings (seriously guys, whats a better word for this?), especially when it comes to desserts.
Another positive: this was so easy to bake. Honestly. After washing the 6 or 7 dishes that I used and wiping down the rouge cocoa powder from the counter, I thought to myself how weird/nice it was having such an easy clean up. Usually when I bake or cook anything, the kitchen looks like a twister blew through it. Not this time though. The cobbler was in the oven and everything was clean in under twenty minutes. Can you imagine?

Chocolate Cobbler
Adapted (if you can call it that..) from Tasty Kitchen

1 cup All-purpose Flour
7 Tablespoons Cocoa Powder, Divided
2 teaspoons Baking Powder
¼ teaspoons Salt
1-¼ cup Sugar, Divided
⅓ cups Melted Butter
1-½ teaspoon Vanilla Extract
½ cups Light Brown Sugar, Packed
1-½ cup Hot Tap Water
½ cups Milk
1 cup chocolate chips (I used milk chocolate)

1. Preheat oven to 350 degrees.
2. First stir together the flour, baking powder, salt, 3 tablespoons of the cocoa, and 3/4 cup of the white sugar. Reserve the remaining cocoa and sugar.
3. Stir in the milk, melted butter, and vanilla to the flour mixture. Mix until smooth. Gently stir in chocolate chips.
4. Pour the mixture into an ungreased 8-inch baking dish.
5. In a separate small bowl, mix the remaining white sugar (1/2 cup), the brown sugar, and remaining 4 tablespoons of cocoa. Sprinkle this mixture evenly over the batter.
6. Pour the hot tap water over all. DO NOT STIR (no matter how tempting!)
7. Bake for about 40 minutes or until the center is set.
8. Let stand for a few minutes if you can hold yourself back.

Friday, July 9, 2010

Taco Melts

I'm usually more of a dessert than main course type gal, but I've had my eye on this Pillsbury recipe for a few months now. It's basically a meal consisting of ground beef, refigerated biscuits, and taco seasoning mix. Does it get any easier than that? The biscuit wraps are tender and flaky and the filling is packed with flavor and suprisingly (delightfully) spicy. It only took about 35 minutes from beginning to end and if you already  have some pre-cooked ground beef on hand, it will be finished even quicker! Just add the seasoning and salsa. Now, when I first pulled these out of the oven  I was a little apprehensive from the look of them. They looked nothing like the neat and crispy biscuit melts posted with the recipe on the website. Instead, they were more pale, plump, and all over the place. Once I opened that baby up though, I knew that I had done good. I'm not the only fan of this recipe, my fellow diners enjoyed these as well. Even after dinner was finished and the dishes were cleaned and the reruns of USA television shows were on, I continued to get compliments. Of course, I have to give 90% of the credit to that cute pillsbury dough boy and his buttermilk biscuits.

Pillsbury Grands! Taco Melts
1 package Old El Paso taco seasoning mix
2/3 cup water
1/2 cup chunky salsa
1 lb lean ground beef (at least 80%) cooked, drained
1 can (16.3 oz) Pillsbury refigerated biscuits (any variety)
1 cup shredded mexican cheese blend

1. Heat oven to 375 degrees. Line a cookie sheet with foil and grease.
2. In medium saucepan, cook taco seasoning mix, water, 1/2 cup of the salsa and cooked ground beef until thickened and water is absorbed.
3. Press each biscuit into 6-inch round. Fill with taco mixture and 1 tablespoon cheese. Fold dough over filling and press to seal. Place on greased cookie sheet.
4. Bake 10 to 12 minutes or until golden brown.

And since I do love treats, I topped off my night with vanilla bean ice cream, hot fudge, and M&Ms. A little dessert never hurt a girl.

Monday, July 5, 2010

Red, White, and Blue

I don't know about you, but to me it doesn't quite feel like summer until we've had the Fourth of July festivities. Something about the barbequing, the drinks, the warm night, and the family getting together really does it for me. Not to mention the fireworks! Oh, and I love any excuse to bake! Even though I don't really need one to begin with.. at least this way I don't eat all the goods by myself (which I've been known to do..) I decided that I would bake festive vanilla cupcakes frosted with red, white, and blue buttercream and some fried strawberry pies. The fried strawberry pies were sort of a last minute thing, I originally wanted to bake individual cherry pies but time literally flew by that day and I already had the ingredients for the strawberry pies and they were so simple to assemble. All it is is strawberries, cornstarch, sugar, and *gasp* refirgerated pie crust! In the end, I had so much strawberry filling left over that I was able to cone out the middle of each cupcake, fill them, and reassemble before frosting them with this rich vanilla bean buttercream. I have to say, the strawberry mixture along with the vanilla cupcake was absolutley DELICIOUS. You see that? You see what I did there? I put it in capital letters to help you understand the explosion of taste that was going on in my mouth with every bite.  I might never eat another cupcake again unless its filled with this fruity goodness (okay.. that might be a little lie so don't hold me to it!).
Fried Strawberry Pies
Courtesy of Southern Living
2 cups fresh strawberries, mashed
3/4 cup sugar
1/4 cup cornstarch
1 (15-ounce) package refrigerated piecrusts
Vegetable oil
Powdered sugar

1. Combine first 3 ingredients in a saucepan. Bring strawberry mixture to a boil over medium heat. Cook, stirring constantly until thickened. Let cool completely.
2. Roll 1 piecrust to press out fold lines; cut into 9 circles with a 3-inch round cutter. Roll circles to 3 1/2-inch diameter; moisten edges with water (*I used egg wash*). Spoon 2 teaspoons strawberry mixture in the center of each circle; fold over, pressing edges with fork to seal. Repeat with remaining piecrust and strawberry mixture.
3. Place pies in a single layer on a baking sheet, and freeze at least 1 hour.
4. Pour oil to a depth of 1 inch into a large heavy skillet; heat to 350°.
5. Fry pies, in batches, 1-2 minute on each side or until golden. Drain on paper towels; sprinkle with powdered sugar.

I know, I know.. The red came out very pink, but I ran out of food coloring! It's American enough for me though!
MmMmMm...........strawberry filling!
Vanilla Cupcakes
1/2 cup unsalted butter, room temperature
2/3 cup granulated white sugar
3 large eggs
1 teaspoon pure vanilla extract
Zest of 1 large lemon
1 1/2 cups all purpose flour
1 1/2 teaspoons baking powder
1/4 teaspoon salt
1/4 cup cold milk

1. Preheat oven to 350 degrees F and line 12 muffin cups with paper liners.
2. In the bowl of your electric mixer, or with a hand mixer, beat the butter and sugar until light and fluffy. Add the eggs, one at a time, beating well after each addition. Beat in the vanilla extract and lemon zest.
3. In a separate bowl whisk together the flour, baking powder, and salt. With the mixer on low speed, alternately add the flour mixture and milk, in three additions, beginning and ending with the flour. Scrape down the sides of the bowl as needed.
5. Evenly fill the muffin cups with the batter and bake for about 18-20 minutes or until nicely browned and a toothpick inserted into a cupcake comes out clean. Remove from oven and place on a wire rack to cool. Once the cupcakes have completely cooled, frost with icing.

Easy Vanilla Bean Buttercream
Courtesy of Cook's Illustrated
2½ sticks unsalted butter, softened
1 vanilla bean, halved lengthwise
2½ cups confectioners’ sugar Pinch salt
1 teaspoon vanilla extract
2 Tablespoons heavy cream

1. In a standing mixer fitted with the whisk attachment, beat the butter at medium-high speed until smooth, about 20 seconds.
2. Using a paring knife, scrape seeds from vanilla bean into butter and beat mixture at medium-high speed to combine, about 15 seconds.
3. Add confectioners’ sugar and salt; beat at medium-low speed until most of the sugar is moistened, about 1 minute. Scrape down the bowl and beat at medium speed until mixture is fully incorporated, about 30 seconds; scrape bowl, add vanilla and heavy cream, and beat at medium speed until incorporated, about 20 seconds, then increase speed to medium-high and beat until light and fluffy, about 4 minutes, scraping down bowl once or twice.

(this buttercream is so good, I could eat it from the bowl!)

Sunday, June 27, 2010

Red Velvet Cuppycake

I had a magnificent lunch this afternoon with my mom at Elephant Bar. Their crab cakes are the most divine morsels of food that I have ever put in my mouth. And on top of that their served in a rich mango sauce that is to die for. Please, don't even get me started on the seared ahi and ginger. After eating this delicious meal and feeling pretty good from my Passion Mai Tai, I was perusing the dessert menu my eyes landed on a Frosted Red Velvet Cupcake. It looked good in the picture, but we thought to ourselves 'why spend money on something that we can easily bake at home?'.. so we bought some red food coloring and the rest is history! The recipe comes from Paula Deen so you know that not only were the cupcakes moist but they were fluffy and rich in flavor. Red Velvet isn't my favorite flavor for cakes and I never really go out of my way to make it, although I have in the past and this recipe definitley puts the others to shame. We decorated them with a standard vanilla buttercream instead of the traditional cream cheese frosting, since it was easier to throw together at the last minute. Besides, I've never ever been a fan of cream cheese frosting unless its piggy backing something carrot flavored.

Grandmother Paula's Red Velvet Cake
Courtesy of Paula Deen

2 cups sugar
1/2 pound (2 sticks) butter, at room temperature
2 eggs
2 tablespoons cocoa powder
2 ounces red food coloring
2 1/2 cups cake flour
1 teaspoon salt
1 cup buttermilk
1 teaspoon vanilla extract
1/2 teaspoon baking soda
1 tablespoon vinegar

1. Preheat oven to 350 degrees F. Prepare muffin pan by lining with cupcake holders.
2. In a mixing bowl, cream the sugar and butter, beat until light and fluffy. Add the eggs one at a time and mix well after each addition. Mix cocoa and food coloring together and then add to sugar mixture; mix well.
3. Sift together flour and salt. Add flour mixture to the creamed mixture alternately with buttermilk. Blend in vanilla. In a small bowl, combine baking soda and vinegar and add to mixture.
4. Pour batter into prepared pan. Bake for 20 to 25 minutes, or until a toothpick inserted into the center comes out clean. Remove from heat and cool completely before frosting.

Vanilla Buttercream Frosting

3 cups confectioners' sugar
1 cup butter
1 teaspoon vanilla extract
1 to 2 tablespoons whipping cream

1.Mix together sugar and butter. Mix on low speed until well blended and then increase speed to medium and beat for another 3 minutes.

2. Add vanilla and cream and continue to beat on medium speed for 1 minute more, adding more cream if needed for spreading consistency.

Sunday, June 20, 2010

Meyer Lemon Triangles

If it's true what they say and we are what we eat, than tonight I am a lemon. I baked these lemon traingle bars for a get together we had at my sister's house this afternoon. I thought that since tomorrow is the first day of summer and the weather is so bright and warm this time of year that lemons would be a perfect way to kick things off. Originally, I was going to bake a lemon pound cake, but the 1 1/2 hour baking time just wasn't going to fit into the schedule. These lemon bars are a sinch to make and can be finished in under an hour, prep time included. They were excellent, from the delicate crust to the rich lemon filling to the powdered sugar on top. Personally, I could not stop munching on them. And that is why tonight ...I am a lemon.

Meyer Lemon Bars
Adapted from Sugarcrafter

1 cup flour
1/2 cup powdered sugar
1 teaspoon Kosher salt
1/2 cup butter, melted

1 cup granulated sugar
2 tablespoons flour
2 eggs
1 teaspoon pure lemon extract
3 tablespoons lemon juice (about 3 Meyer lemons)
2 teaspoons lemon zest (from about 2 of the Meyer lemons)

Powdered sugar, for dusting

Directions
1. Preheat oven to 350 degrees.
2. In a medium bowl, whisk together the flour, powdered sugar and salt. Stir in the melted butter and then press the dough into a greased 8x8 inch pan. Bake for 15-20 minutes or until the crust turns light brown.
3. Reduce the heat to 300 degrees.
4. In another medium bowl, mix together the sugar, flour, eggs, lemon juice, and lemon zest.
5. Pour the lemon mixture over the crust and bake for 20-25 minutes.
6. After removing from the oven, lightly dust the top with powdered sugar.
7. Cool completely and then cut into squares. Then cut each square diagonally to form triangles.

Saturday, June 19, 2010

Oatmeal Raisin Cookie Coffee Cake

I've always been a fan of a good warm oatmeal raisin cookie. I'm a fan of the texture and I enjoy the spurts of chewy raisin. Another fan of oatmeal raisin in the house is my dad. Actaully, he is more of an oatmeal raisin enthusiast. It has always been his favorite cookie and guilty pleasure and he makes no secret of it. Since it's Fathers Day weekend, I thought it would be nice to bake this Oatmeal Raisin Cookie Coffee Cake for him. The plan was to bake this morning so that he would be able to eat it for breakfast (cake for breakfast again Grace?) however due to extenuating circumstances I put it together last night. My poor dad, by the time he woke up this morning more than half of it was gone. But thats what being a dad is about right? making sacrafices for your kids. Secretly, I think he had a few pieces in the middle of the night like every one else did. This cake is very simple and the buttermilk really adds to the moist texture. The raisins in the middle of the cake spread over the cinnamon topping mixture tastes fantastic! If you have a food processor I recommend using it for the topping so that it isn't too coarse. I used my hands and as you can see from the pictures that it is a little lumpy and didn't bake into the cake very well. It's still very delicious though and full of cinnamon and butter goodness!

Oatmeal Raisin Cookie Coffee Cake
2 cups all purpose flour
2/3 cup quick cooking oats
2 tsp baking powder
1/2 tsp salt
1 1/4 cups sugar
1/2 cup butter, room temperature
2 large eggs
1 cup buttermilk
1 tsp vanilla extract

Filling-Topping
1/2 cup all purpose flour
1 cup brown sugar
1/2 cup butter
1 1/2 tsp ground cinnamon
2/3 cup raisins

1. Preheat the oven to 350 degrees F. Flour a 9 inch springform pan. In a medium mixing bowl, whisk together the flour, oats, baking powder, and salt.
2. In a large mixing bowl, cream together butter and sugar until light. Beat in eggs one at a time. Blend in 1/3 of the flour mixutre, followed by half of the buttermilk and the entire vanilla. Then, blend in half of the remaining flour, the rest of the buttermilk, and then the last of the flour. Set aside and prepare topping.
3. For the topping, combine the flour, brown sugar and cinnamon in a medium bowl and stir well. Rub butter into the mixture with your fingertips (with pulsing with a food processor) until the mixture resembles coarse sand.
4. Pour half of the batter into the prepared springform pan. Top with half of the topping mixture. Evenly sprinkle raisins in a single layer. Pour remaining batter on top and spread carefully to the sides of the pan. Sprinkle all remaining topping over the batter.
5. Bake for 45 - 50 minutes, or until a toothpick inserted into the center comes out clean. Allow cake to cool on wire rack until it is room temperature before running a knife around the edge and removing springform.