Friday, August 13, 2010

Pineapple Upside Down Cake

I've had the this almost aching culinary urge to bake a pineapple upside down cake. I'm not quite sure what triggered it or when this desire started brewing but it was just something that needed to be done. The past couple of weeks I've been searching for a recipe that I liked and slowly building up the ingredients with every trip to the market. It just so happens that everything fell into place tonight and I just had to bake this! The recipe originally says to bake in a 9x2 inch round pan but I figured that this would be the perfect opportunity to use my cast iron skillet and who doesn't love bringing one of those out, right? Since the skillet is larger, the cake came out a little flat. Other than that though (and thats no big deal!), I was super pleased with it. It easily transferred from the skillet to the plate which was great since I was really worried that the fruit or cherry pieces would be askew. I've had some troublesome experiences with cakes in the past! But it came off so neat that I didn't even want to cut into it. I resisted as long as I possibly could (honest), but after sitting on the couch fiddiling my fingers trying to ignore the smell of heaven coming from the kitchen.. I gave in! I cut myself a slice as neat as I possibly could and ate it up. This particular recipe uses buttermilk which really gave this cake an extremley moist textrure. Which I'm a fan of. I'm also a big fan of the sinful butter and brown sugar combination. And I love getting a fork full of delicious pineapple on top of all of that!

If you get that "where-is-this-coming-from?" pineapple upside down cake desire, keep this one in mind.
Pineapple Upside Down Cake

(20 oz can) 7 slices canned unsweetened pineapple, drained. Reserve 3 tablespoons of the juice.
19 maraschino cherries
3 tablespoons unsalted butter
3/4 cups packed light brown sugar
2 large eggs
2 tablespoons buttermilk
1/2 teaspoon vanilla
1 cup all purpose flour
3/4 cup granulated sugar
3/4 teaspoon baking powder
1/4 teaspoon baking soda
1/4 teaspoon salt
6 tablespoons unsalted butter, room temperature
6 tablespoons buttermilk

1. Preheat oven to 350 degrees. Have ready a 9x2 inch round cake pan (or cast iron skillet). Drain pineapple (reserving 3 tablespoons juice) and place on paper towels to absorb excess juice.
2. Place the 3 tablespoons unsalted butter in the pan/skillet. Place in the oven until teh butter is melted. Tilt to coat all sides with butter. The extra butter will settle in the pan. Sprinkle the brown sugar evenly over the bottom of the pan.
3. Place one pineapple ring in the center of the pan and arrange six more around it. Place the cherries in the center of each ring anf in the spaces inbetween them. In a small bowl, whisk together the eggs, 2 tablespoons of buttermilk and vanilla with a fork. Add reserved pineapple juice. Set aside.
4. In a mixer bowl, whisk together the flour, sugar, baking powder, baking soda, and salt. Add the 6 tablespoons of buttermilk and 6 tablespoons of unsalted butter. Beat on low speed just until the flour is moistened, then increase the speed to medium and beat for 1 1/2 minutes. The batter will be stuff. Add one third of the egg mixture at a time, beating for 20 seconds inbetween.
5. Scrape the batter over the fruit in the pan and spread evenly.
6. Bake until a toothpick inserted in the cake comes out clean, about 35 - 40 minutes (took me 35). Remove the cake from the oven and let cool for 2 to 3 minutes before unmolding.
7. Invert a serving platter on top of the pan/skillet. Cover your hands with oven mitts and turn the cake onto the platter, lift off the plan. If any of the fruit or cherry pieces are askew, use a fork and push them back into place.

Tuesday, August 10, 2010

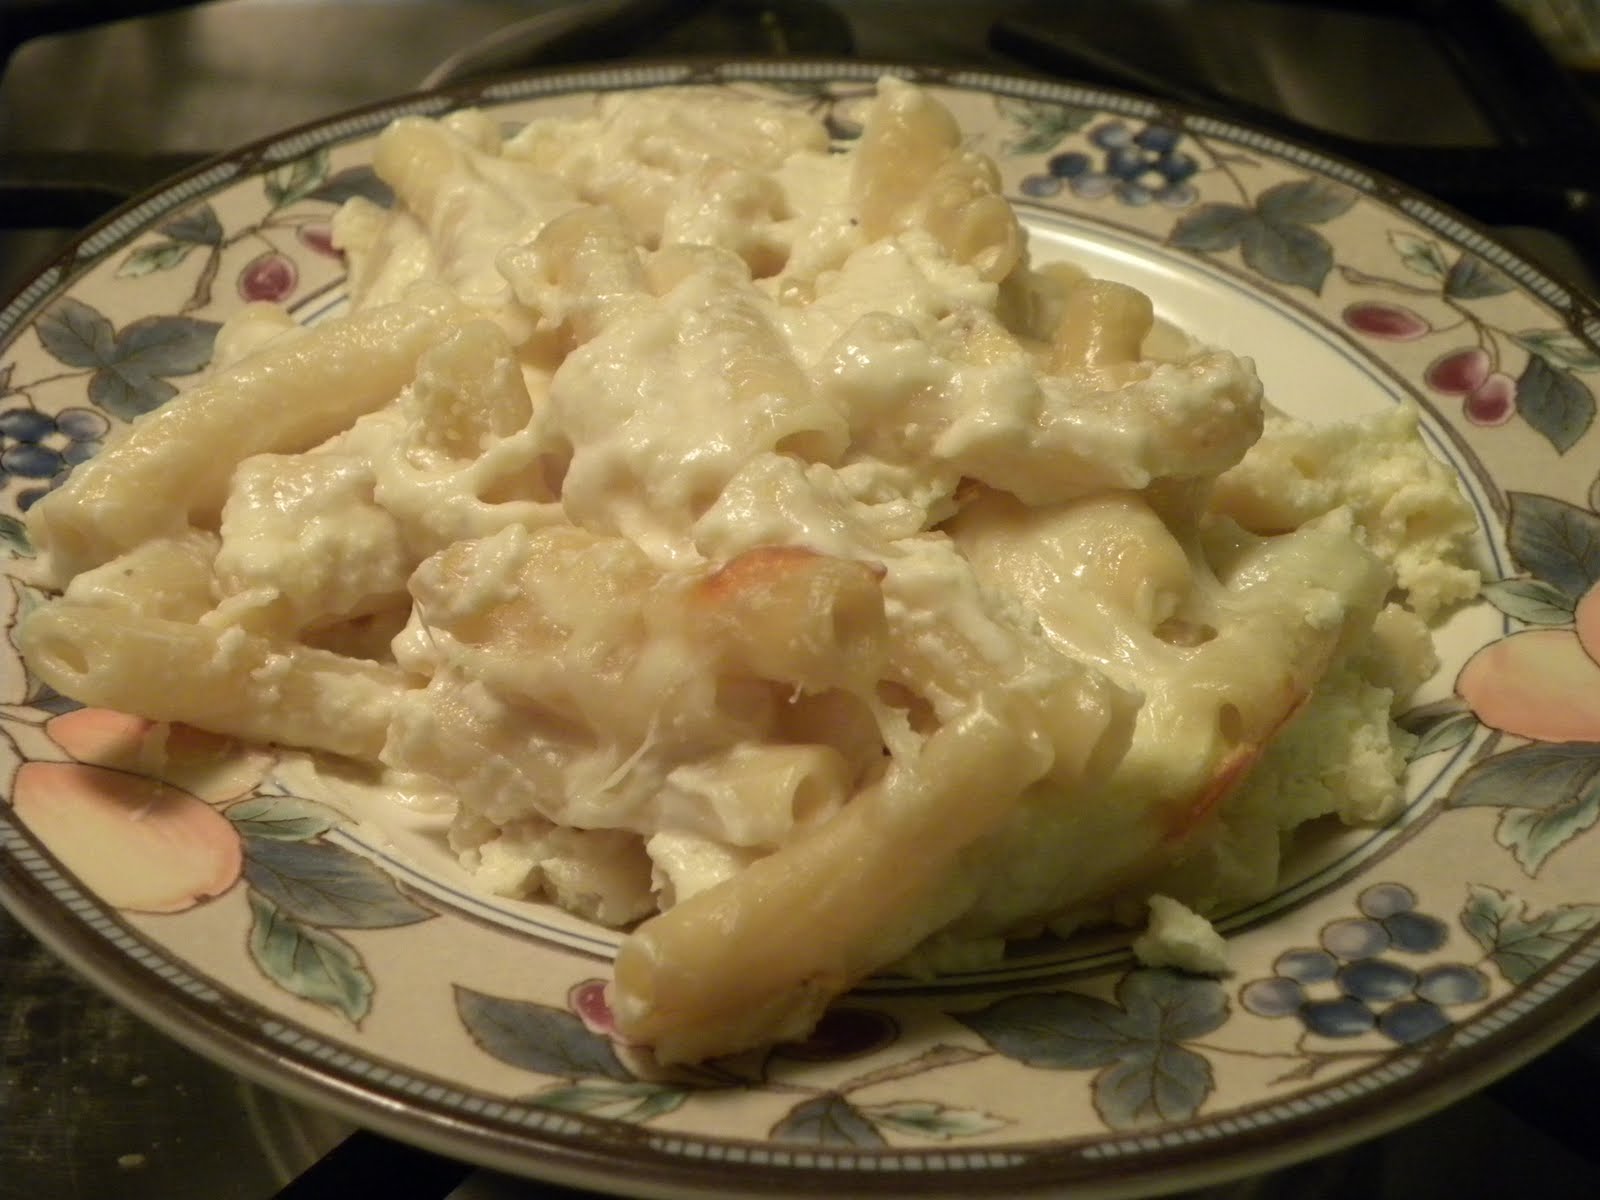
Three Chese Pasta Bake

As you can probably tell by now, I prefer baking to cooking. It isn't that I'm a horrible chef or that I hate to cook, I just don't get the same kind of pleasure out of cooking dinner that I do from baking a splendid dessert. My mom on the other hand is a queen of all trades. She will whip up the appetizer, main course, and dessert, all the while sipping a martini and not only exceed our expectations, but enjoy the process (compliments of the martini perhaps?). I must have not inherited that gene from her. Or maybe I did and it just hasn't risen to the surface yet. Am I not living up to my full hostess potential? Will I just wake up one morning and insist upon cooking three course meals every night? Only time will tell. For now though, I thought it would be nice to cook a quick and easy dinner over the weekend. I've had this recipe stashed away on my computer for a while now and always wanted to cook/eat it. My brother is not a big pasta eater and the only way he will touch the stuff is if it hasn't been in direct contact with red sauce of any kind. He even orders his pizza without any sauce. I can't be the only one who thinks that is crazy, right? I love love love pasta and I love it even more covered (smothered) in red sauce. To each his own though I suppose. Since he is so complicated, this dish worked out perfectly for him! Not a drop of red in sight. Just creamy alfredo, ricotta, and sour cream. Not to mention cheese! I added significantly more cheese than the original recipe called for because that's pretty much my motto for any recipe with cheese. More is always better. You can't go wrong!

Three Cheese Pasta Bake
Based on this recipe 
1  (16-ounce) package ziti
2  (10-ounce) containers refrigerated Alfredo sauce
8-ounce container sour cream
15-ounce container ricotta cheese
2  large eggs, lightly beaten
1 cup  grated Parmesan cheese
1/4  cup chopped fresh parsley
2  cups  mozzarella cheese

1. Prepare ziti according to package directions; drain and return to pot.
2. Stir together Alfredo sauce and sour cream; toss with ziti until evenly coated. Spoon half of mixture into a lightly greased 13- x 9-inch baking dish.
3. Stir together ricotta cheese, eggs,  1/2 cup of Parmesan cheese, and parsley; spread evenly over pasta mixture in baking dish. Spoon remaining pasta mixture evenly over ricotta cheese layer; sprinkle evenly with 1 cup mozzarella cheese.
4. Bake at 350 for about 20 minutes. Carefully pull out the baking dish and sprinkle on remaining 1/2 cup of Parmesan cheese and 1 cup mozzarella cheese (especially in the corners). Place baking dish back in the oven and bake for another 10 minutes or until the cheese begins to bubble.

Friday, August 6, 2010

Triple Chocolate Chip Oatmeal Cookie

Today was the kind of day that needed a cookie. The kind of day that begged me for a chewy, chocolatey, straight out of the oven little piece of heaven. As I sit here updating my blog, watching 17 Again (judge me later), and taking little bites of this delicious morsel of flavor.. I realize that this is the highlight of my day. This single cookie has made my day. Keeping in mind that today is a Friday aka the gateway to the weekend and that I got paid today, well, that says a lot about this cookie- don't you think?

Triple Chocolate Chip Oatmeal Cookie
3 cups all purpose flour
1 teaspoon baking powder
1 teaspoon baking soda
1/4 salt
3 sticks unsalted butter, room temperature
2 eggs
1 1/4 cup granulated sugar
1 1/4 cups packed light brown sugar
1 tablespoon vanilla extract
1 1/2 cups rolled oats
1 cup semi sweet chocolate chips
1 cup white chocolate chips
1/2 cup butterscotch chips

1. Preheat oven to 350 degrees. Grease cookie sheet or line with parchment paper.
2. In a medium bowl whisk together flour, baking powder, baking soda, and salt. Set aside.
3. In a large mixing bowl, cream together the butter and sugars. Beat in the eggs one at a time mixing well after each addition. Mix in vanilla extract.
4. Gradually beat in the flour mixture, mixing only until the dough comes together. Do not overmix.
5. With a large wooden spoon or spatula stir in the rolled oats followed by the chocolate chips.
6. Spoon the cookies on the prepared cookie sheet about two inches apart and bake for about 14 minutes or until the cookies are slightly browned aorund the edges but still soft and puffy in the middle. Rotate the baking sheets halfway through the baking time.

Wednesday, August 4, 2010

blondie bomb

Take a good look at these deformed blondie eye sores. You see that? That is what happens when you don't measure your ingredients correctly. And when I say ingredients, I mean ingredient. Anyone care to take a guess at which important ingredient was messed with here? If you said brown sugar you would be wrong. But if you said baking powder...congratulations, you got it :). Yes, somewhere along the road 1/8 teaspoon of baking powder became 1/4 teaspoon of baking powder. And baking powder -being the important rising ingredient that it is-.. well, you can guess the rest! I couldn't have messed things up too badly though because, despite the appearance, these still tasted pretty darn good and had that distinctive molasses flavor from the dark brown sugar. They were rich, chewy, and the butterscotch chips were a delicious add in. So in the end, even though the blondies weren't perfect or very aesthetically pleasing, there was no real loss. Besides, if there's one thing I've learned from my baking (mis)adventures its that sometimes you have to make mistakes, learn from them, and hope for the very best when you pop the finished product into your mouth.

Blondies
1/2 cup of butter, melted
1 cup of tightly packed dark brown sugar
1 egg, lightly beaten
1 teaspoon of vanilla
1/2 teaspoon baking powder
1/8 teaspoon of baking soda
Pinch of salt
1 cup of all-purpose flour
1/3 cup of butterscotch chips (chopped walnuts and chocolate chips are equally tasty)

1. Preheat the oven to 350°F. 
2. Lightly butter and flour an 8x8 pan. 
3. Whisk together the melted butter and sugar in a bowl.
4. Add the egg and vanilla extract and whisk.
5. Add the flour, baking soda, baking powder, and salt, mix it all together. Add the butterscotch chips or other mix-ins.
6. Pour into the pan and spread evenly. Bake for 20-25 minutes or until a toothpick comes out clean. Allow to cool. Cut into squares and serve.

Sunday, August 1, 2010

Whopper Cookies

Recently I have been having a love affair with Whoppers malted milk balls. I'm not sure why it's a love affair, but the way that I feel when I eat them is close to what I think a love affair would feel like. I don't feel that way when I munch on my usual chocolate go-to M&Ms. Therefore it is a love affair. I hope that made sense to someone other than myself. I actually have a box right here next to me that I'm slowly munching on, dreading the moment when I reach my hand in and there is no more malty crunchy goodness. After I had purchased a few boxes at the market yesterday, I decided that instead of just eating them straight up, I would look for a simple whopper recipe online. Google led me to an incredibly simple and quick cookie baked with whoppers. The cookies themselves tasted really good. They were soft and chewy with a crunchy edge. Next time I would add more whoppers. It seemed like more of a sugar cookie with the occasional whopper as opposed to a whopper overload with a little cookie to back it up (like I was hoping). I can't really complain though. I got a genuinly good cookie out of it and was able to snack on whoppers while I was baking up the cookie and while I was enjoying the finished product. Maybe I should have made that whopper milkshake on the back of the box to go along with it. How freaking delicious does that sound?

Whopper Cookies
Recipe from Cast Sugar

2 1/4 cup all purpose flour
1 tsp. baking soda
1/2 tsp. baking powder
1/2 tsp. salt
3/4 cup butter, room temperature
1 cup granulated sugar
1/2 cup milk
1 tsp. vanilla extract
1 1/2 cup roughly chopped Whoppers
1. Preheat the oven to 350F and line a baking sheet with parchment paper.
2. In a medium bowl, whisk together flour, baking powder, baking soda and salt.
3. In a large bowl, cream together butter and sugar until light and fluffy. Stir in milk and vanilla, then gradually blend in the flour mixture. Do not overmix; stir only until no streaks of flour remain.
4. Stir in the chopped Whoppers
5. Drop into 1-inch balls (tbsp.-sized balls) on the prepared baking sheet and bake for 12-14 minutes, until lighty browned.
6. Cool on baking sheet for 2-3 minutes, then transfer to a wire rack to cool completely.

Makes about 3 dozen cookies.

Sunday, July 25, 2010

Nutella Chocolate Fudge Brownies

Believe it or not, I've never baked brownies from scrath that didn't end up tasting dry and dull (ie: tasteless). I also have never eaten Nutella before. All of this changed over the weekend. These brownies actually came out of the oven moist with the perfect amount of crunch on the top. The chocolate chips were like a welcome pocket of chocolate bursting from random bites. The brownies actually reminded me of the Mrs. Fields brownies that my sister and I used to convince my grandma to buy us at the mall when we were little girls. What made these even better was that the recipe calls for spreading Nutella over them! I love Nutella. I can say that now. I might start eating it out of the jar or spreading it randomly on cookies and crackers. These brownies really were so good that you don't need the Nutella spread. They can hold their own. If tomorrow wasn't Monday, I would bake up another batch and eat them at my pleasing. But I can't stroll into work with chocolate crumbs around my mouth and my clothes not fitting. If only..

Nutella Chocolate Fudge Brownies
Recipe from Bunny's Warm Oven
4 - one ounce squares unsweetened chocolate
1 cup unsalted butter (2 sticks)
2 1/2 cups sugar
4 large eggs
1 Tablespoons pure vanilla
1/8 teaspoon salt
1 cup unbleached white flour
1 cup chocolate chips, optional (recommended)
1/2 - 1 whole jar of Nutella

Preheat oven to 350 degrees F. Butter or spray and flour a 9 X 13 inch glass or non-stick baking pan.
Chop unsweetened chocolate and melt chocolate and butter in a large saucepan over medium heat. Do not burn. Remove from heat.
Using a wooden spoon or spatula, add sugar and stir until well mixed.
Add eggs, vanilla and salt and beat well with a wooden spoon.
Fold in flour and mix just until smooth. Do not over mix. Fold in chocolate chips.
Pour into prepared pan.
Bake for 35-40 minutes or until knife comes out clean.
Cool for about 15 minutes, then spread desired amount of Nutella over warm brownies.
Cool completely before cutting into squares.

Don't you hate waiting for the cooling process to be complete?

Saturday, July 17, 2010

Mission: Chocolate

I had a craving this evening when I got home from work. Actually, craving is putting it lightly. It was more of an intense and urgent desire. It was a need for chocolate. Something triggered in a section of my brain as I sat at my desk waiting for the clock to strike 6:00 and my boss to sign my pay check. I tried to be good and soothe my craving with some handfuls of Special K Chocolate Delight cereal. But I'm only human. A human girl. A human girl who needed a serious chocolate fix. I made the decision to indulge myself with this chocolate cobbler. The best way to describe this is a large chocolate molten cake. The chocolate batter is spread in the baking dish, a mixture of sugars and cocoa powder is sprinkled over it, and then it's topped off with hot water before being baked. The original recipe doesn't call for chocolate chips, but I couldn't resist adding some to the batter. As soon as you cut into the cakey top of this cobbler, the perfect amount of rich chocolate oozes out for your delight. I'm telling you.. this is a dessert that was created to be served and melted into vanilla ice cream. Any flavor ice cream would be delicious (I'm sure), but there's something about vanilla that always seems to compliment certain flavors. After eating a two bowl(s) and vegging out on the couch rubbing my stomach with what I'm sure was a silly grin on my face, I felt quite satisfied. I've always been a fan of giving into cravings (seriously guys, whats a better word for this?), especially when it comes to desserts.
Another positive: this was so easy to bake. Honestly. After washing the 6 or 7 dishes that I used and wiping down the rouge cocoa powder from the counter, I thought to myself how weird/nice it was having such an easy clean up. Usually when I bake or cook anything, the kitchen looks like a twister blew through it. Not this time though. The cobbler was in the oven and everything was clean in under twenty minutes. Can you imagine?

Chocolate Cobbler
Adapted (if you can call it that..) from Tasty Kitchen

1 cup All-purpose Flour
7 Tablespoons Cocoa Powder, Divided
2 teaspoons Baking Powder
¼ teaspoons Salt
1-¼ cup Sugar, Divided
⅓ cups Melted Butter
1-½ teaspoon Vanilla Extract
½ cups Light Brown Sugar, Packed
1-½ cup Hot Tap Water
½ cups Milk
1 cup chocolate chips (I used milk chocolate)

1. Preheat oven to 350 degrees.
2. First stir together the flour, baking powder, salt, 3 tablespoons of the cocoa, and 3/4 cup of the white sugar. Reserve the remaining cocoa and sugar.
3. Stir in the milk, melted butter, and vanilla to the flour mixture. Mix until smooth. Gently stir in chocolate chips.
4. Pour the mixture into an ungreased 8-inch baking dish.
5. In a separate small bowl, mix the remaining white sugar (1/2 cup), the brown sugar, and remaining 4 tablespoons of cocoa. Sprinkle this mixture evenly over the batter.
6. Pour the hot tap water over all. DO NOT STIR (no matter how tempting!)
7. Bake for about 40 minutes or until the center is set.
8. Let stand for a few minutes if you can hold yourself back.